Use a spreadsheet to record parent contacts. Use the spreadsheet to generate an email so that it is logged and sends the email. Use the Send Email menu to send to contacts that are checkboxed.
Contacts Tab
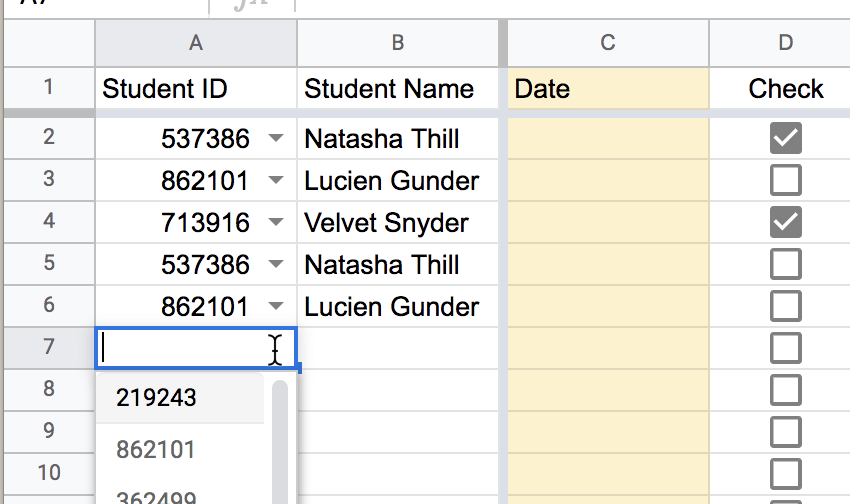
The first tab is the Contacts tab. This is where you simply keep a list of the contacts. This is done by STUDENT ID NUMBER. The reason for this is that numbers are more accurate to log. When you select their ID number from the drop down, the students name will automatically populate.
Reasons Tab
Being consistent is the key to having good data. Use the Reasons tab for a list of generic reasons why you're making a parent contact. This list on the Reasons tab provides you with a list for the drop down in Column E.
Students Tab
You can use any SID numbers you want. Just use 1, 2, 3, etc... it does not have to be their real student ID number.
Hint: You can use their name as their SID. The point is you want to make sure you use the exact same "code" per student. Let's say I have 2 Mary's in 3rd period. My SID code could be 3MaryJ and 3MaryP
Put the parent contact information on the students tab so it is easy for you to find. Also, the Add-on will email parents and guardians so make sure you have an email address for that to work.
Pivot Table Tab
This will automatically count how many contacts have been made per student and for what reason.
Add-on Menu
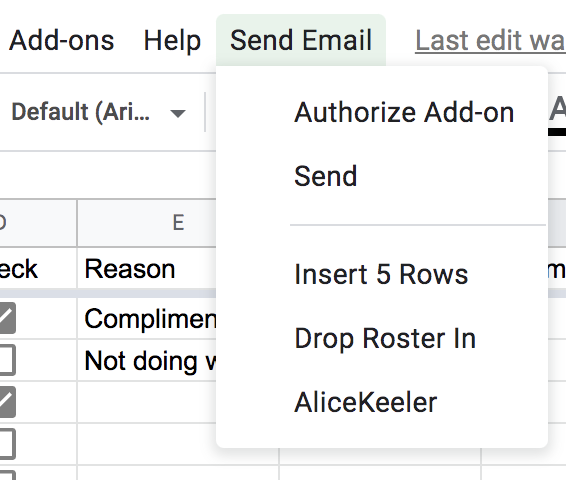
Look for the Send Email menu. This is how you can send emails from the Add-on. Emails will only be sent to the items that have the checkbox checked!
Insert 5 Rows
If you want too add contacts to the TOP instead of the bottom... use "Insert 5 Rows" to add 5 blank rows at the top. Remember, this is a spreadsheet. You can always sort by the date so do not worry about trying to keep the contact log in the order you made the contacts.
Drop Roster In
Premium Member Shirley said she likes to use the Contact Log for emailing all the parents at once. But she would have to copy paste the roster SID each time. So I automated that it will add the entire roster to the top of the contact log automatically for you.
Spacebar for Checkmarks
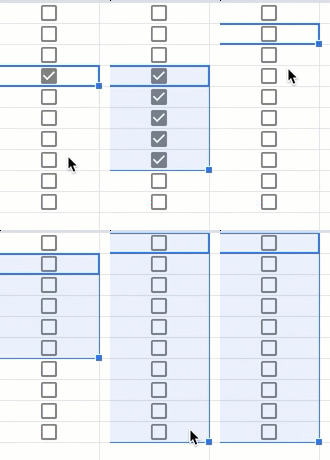
TIP: When there are checkboxes in Google Sheets you can use the spacebar to check and uncheck. If you are sending an email to more than one parent, click on the checkbox of the first contact. Hold down shift and click on the checkbox of the last one. Press spacebar. All of the checkboxes in the list will be selected.