My newest Add-on does an odd thing... it creates a clear rectangle over the slide. Why would you want this? It does 2 things...
1. Prevents navigating to the next slide
When you are using Google Slides as a choice board or choose your own adventure or as a kiosk you do not necessarily want the user to go to the next slide. The trick for this is to create a rectangle over the whole slide with the fill and border set to transparent. You want to hyperlink the transparent rectangle to the current slide. Then, when the user clicks on the slide it won't go anywhere.
You then put a button on TOP of the slide for the user to click so you are intentional about where the user navigates to.
2. Creates a button on the slide
When I am giving a presentation I sometimes want to link out to a resource. While I am in presentation mode it doesn't make sense for me to have a QR code for myself. I need to click a link to open up the website in another tab. I can create a rectangle to act as a button and hyperlink the slide When you click o the spot where you have the transparent rectangle it will open the site up in another tab.
How to Hyperlink
Click on an item on your Google Slides and use Control K (Command K on a Mac). This will allow you to turn the object into a button.
Using Clear Rectangle
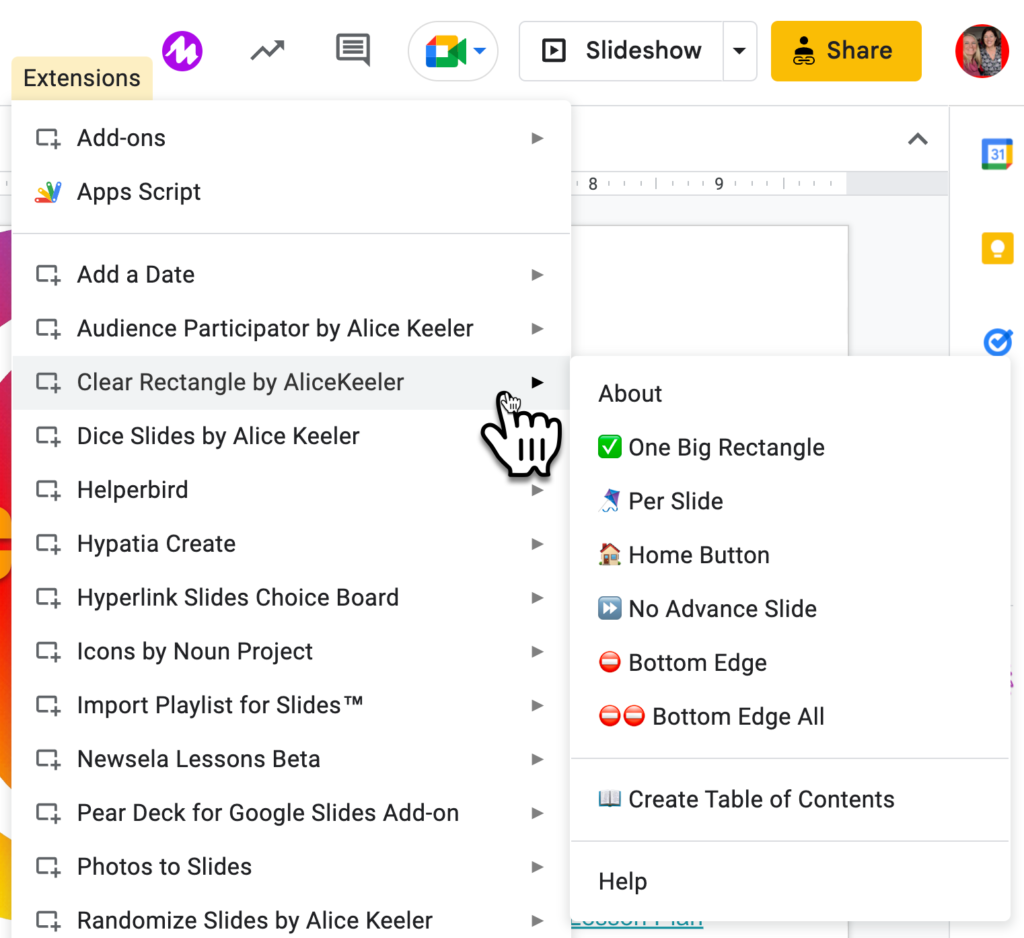
The premise of Clear Rectangle is to automatically create the clear rectangles for you.
One Big Rectangle
This will add a clear rectangle over the whole slide. You will want to manually hyperlink the rectangle to whatever site you want. This is a big time saver! It's fast and easy to turn your slide into a giant button.
You will need to click on the clear rectangle and use Control K to hyplerlink.
Per Slide
Want a big button on each slide? Use the Per Slide option. This will automatically add a clear rectangle on all sides.
You must manually hyperlink each clear rectangle on the slides.
Home Button
Once you put the clear rectangle over the slide you will want to add buttons on top of the clear rectangle that you intentionally hyperlink to create the navigation. Choosing Home Button will add a button to ALL the slides that will navigate the user back to the first slide.
No Advance Slide
What if you do NOT want to hyperlink to a website. What if you just want to control the navigation in your Slides? No Advance Slide adds a clear rectangle to ALL the slides. However, the slides are automatically hyperlinked. These clear rectangles link to the current slide. So when the user clicks on the slide it does NOT advance to the next slide but instead remains on the current slide.
You will need to add navigation buttons on top of the clear rectangle to give the user options for how to move from the current slide.
Bottom Edge
Choosing Bottom Edge adds a Clear Rectangle (NO automatic hyperlinking). However, the bottom 10% of the slide is NOT covered by the rectangle. This allows you to give a presentation and still click right on the slide (at the bottom) to advance to the next slide. However, clicking on the upper part of the slide can act as a button to hyperlink to a website.
Bottom Edge All
This adds the Bottom Edge option to ALL the slides.